Plugin JT Contact Maps
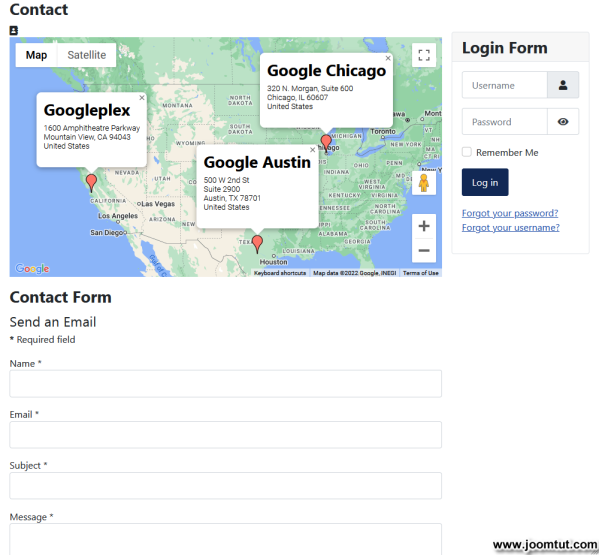
JT Contact Maps is a plugin for Joomla! This plugin JT Contact Maps can display your location with Google maps on the contact page. You can selectable to display single or multi locations with image, title, informations,...
Plugin JT Contact Maps Features
- Display your location with Google maps on your website
- Use Google Maps API V3
- Adjust maps width and height
- Auto/Custom maps language
- Zoom/Pan/Wheel control
- Maps type selectable
- Single or multiple locations on map
- Change Marker Icon
- Display your image on maps
- Display Window Info
- Customize Window Info
- Coordinates Tools
- Custom CSS
- Support the most common browser with latest version
- Compatible with Joomla! version: 3.x, 4.x and Joomla! 5.x with Behaviour - Backward Compatibility
Changes from the previous version
- Work on Joomla! 5.x with Behaviour - Backward Compatibility.
- Fixed the plugin not working well on some websites.
- Optimized to increase loading speed.
Download Plugin JT Contact Maps
Download Plugin JT Contact Maps
Video Clip
Coming soon
Plugin JT Contact Maps Documentation
1. Install the plugin JT Contact Maps.
2. Go to Plugins Manager and open the plugin JT Contact Maps.
3. Enable the plugin JT Contact Maps.
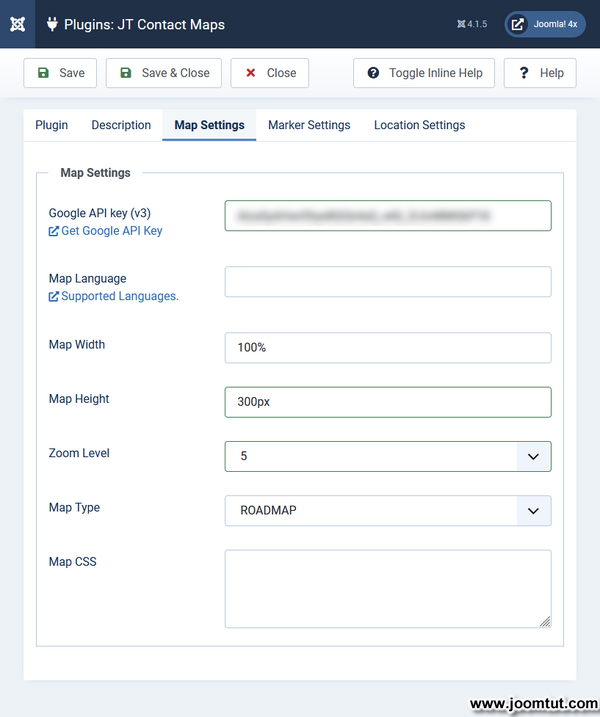
4. Enter Google Maps API Key V3 in Map Settings.
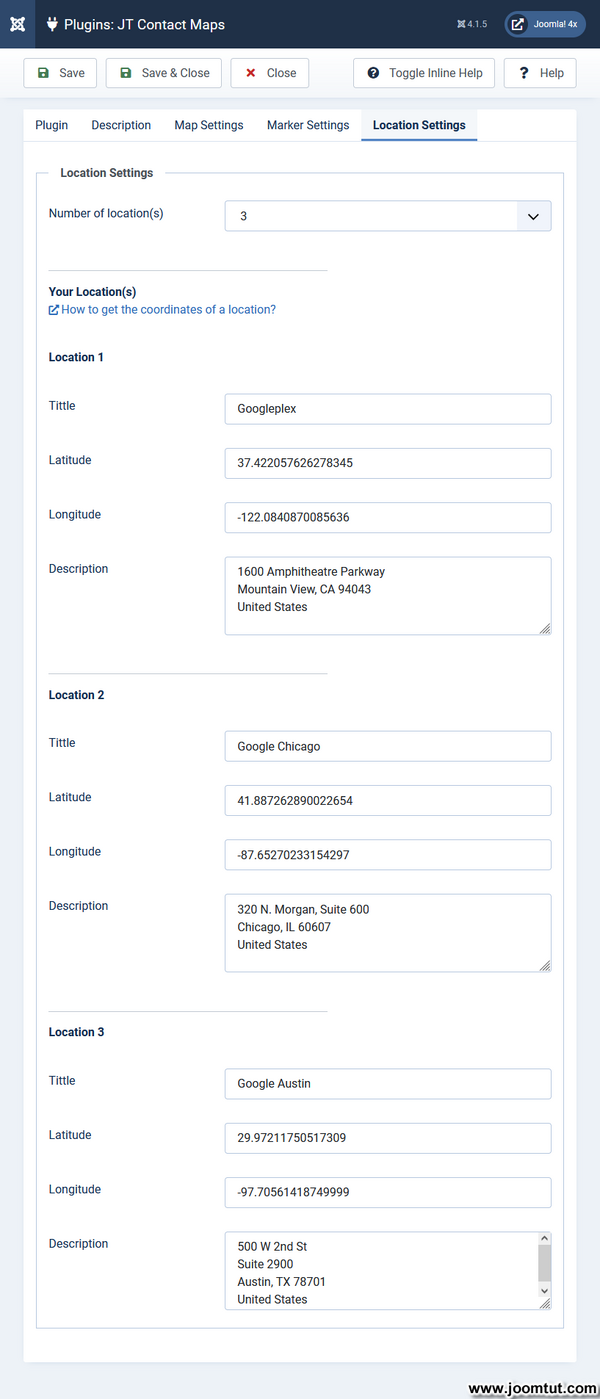
5. Enter your location information in Location Settings.
6. Change other settings or keep default settings and click Save & Close.
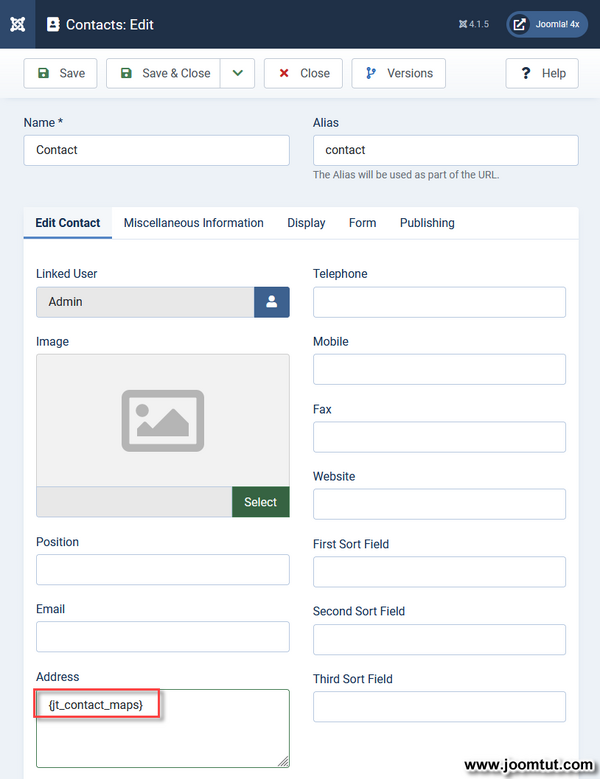
1. Open your contact, article, module,...
2. Enter the tag {jt_contact_maps} anywhere you want to display your map.
3. Click Save & Close.
4. Clear your Joomla! cache and your Browser cache.
5. Go to your site then refresh your browser.
If you see Plugin JT Contact Maps display on your website, this plugin works well on your site. If not, please view Troubleshooting below.
If you have installed the plugin JT Contact Maps Free, you don't need to remove it, just install the plugin JT Contact Maps Pro and open it then click Save to apply the Pro features. Your plugin will be upgraded to Pro and you can use the Pro settings of this plugin.
Please back up your website before making any changes.
1. Go to Plugins Manager and open the plugin JT Contact Maps.
2. Select number of locations as you want in Location Settings.
3. Enter your location information.
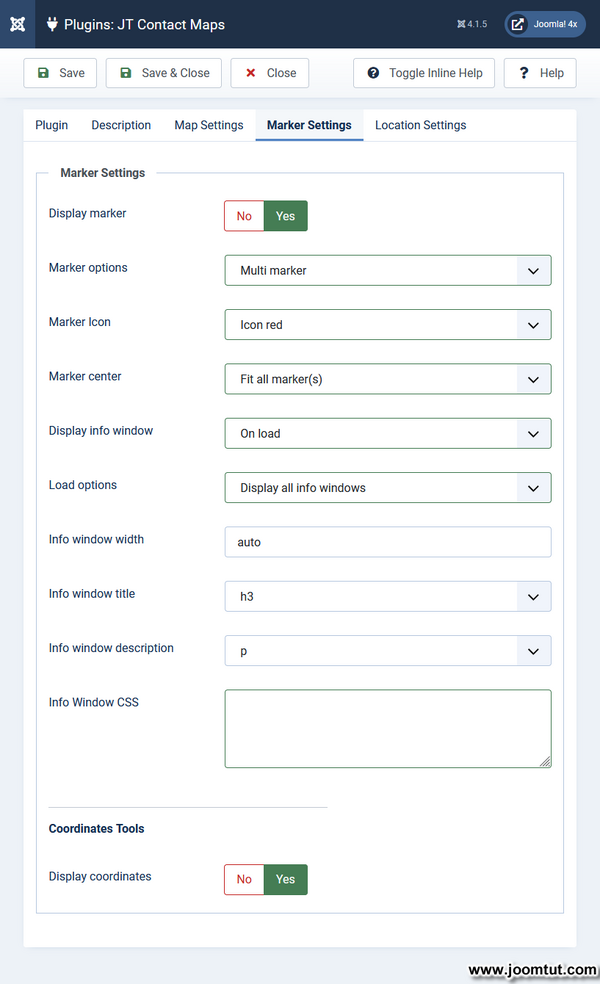
3. Change Marker options to Multi marker
4. Change other settings or keep default settings and click Save & Close.
5. Use the tag {jt_contact_maps} anywhere to display multi location on your map.
Live Demo: Plugin JT Contact Maps - Display multiple locations on your map
1. Go to Plugins Manager and open the plugin JT Contact Maps.
2. Select number of locations in as you want Location Settings.
3. Enter your location information.
3. Change Marker options to Single marker
4. Change other settings or keep default settings and click Save & Close.
5. Use the tag {jt_contact_maps_1} anywhere to display Location 1 on your map. Use the tag {jt_contact_maps_2} anywhere to display Location 2 on your map. Use the tag {jt_contact_maps_3} anywhere to display Location 3 on your map...
Please note that only one map is displayed on the same page.
Live Demo: Plugin JT Contact Maps - Display single locations on your map
Plugin JT Contact Maps Troubleshooting
1. Go to Pluings Manage and open the plugin JT Contact Maps.
2. Check to make sure the Status is Enabled and all settings are correct.
1. Go to Plugins Manage and open the plugin JT Contact Maps
2. Go to Map Settings tab and check Google Maps API Key V3

