Joomla! installation source is packaged as a compressed file. To install it you have to upload to your private virtual server – VPS then extract it. You can do this by using PuTTY to make an SSH connection to your server, then execute the commands.
Step to get and unzip Joomla! installation package on private virtual server – VPS
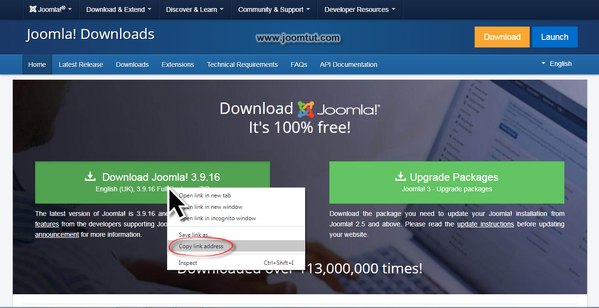
1 Get the link of the current version of Joomla! installation package at Joomla! download page.
Get Joomla! installation package at: https://downloads.joomla.org/
- Right click your mouse on the download button, you will get the link like this:
https://downloads.joomla.org/cms/joomla3/3-9-16/Joomla_3-9-16-Stable-Full_Package.zip?format=zip - Please remove
?format=zip - Now the link will be:
https://downloads.joomla.org/cms/joomla3/3-9-16/Joomla_3-9-16-Stable-Full_Package.zip
This link will vary depending on the current version of Joomla!
2 Connection to your VPS using PuTTY
Read more: How to make an SSH connection to your server using PuTTY
3 Run the command to go to your webroot directory.
cd /home/admin/web/joomtut.xyz/public_htmlReplace joomtut.xyz with your domain name.
4 Run the command to download the latest Joomla! installation package.
wget https://downloads.joomla.org/cms/joomla3/3-9-16/Joomla_3-9-16-Stable-Full_Package.ziphttps://downloads.joomla.org/cms/joomla3/3-9-16/Joomla_3-9-16-Stable-Full_Package.zip is the link you got at Step 1
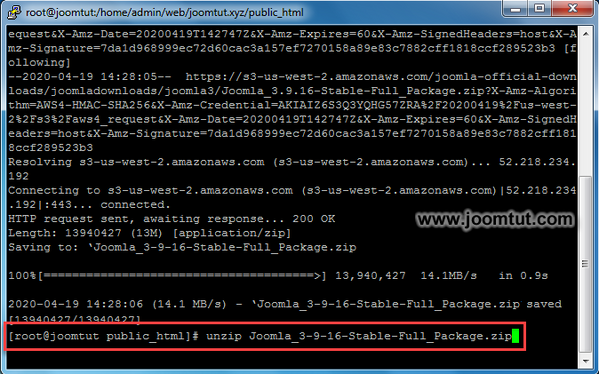
5 Run the command to unzip Joomla! installation package
unzip Joomla_3-9-16-Stable-Full_Package.zipJoomla_3-9-16-Stable-Full_Package.zip is the name of Joomla! installation package file. This name will vary depending on the current version of Joomla!
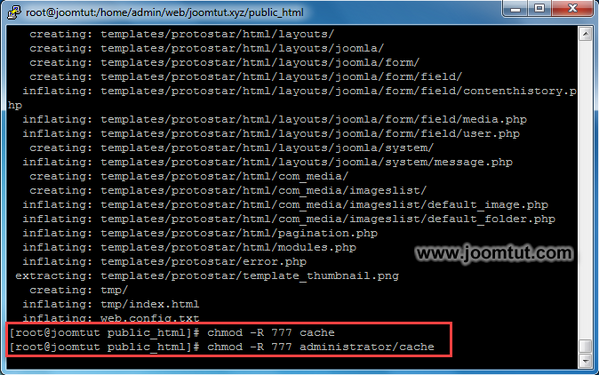
6 Run the chmod command to change the permission for Joomla! cache folder.
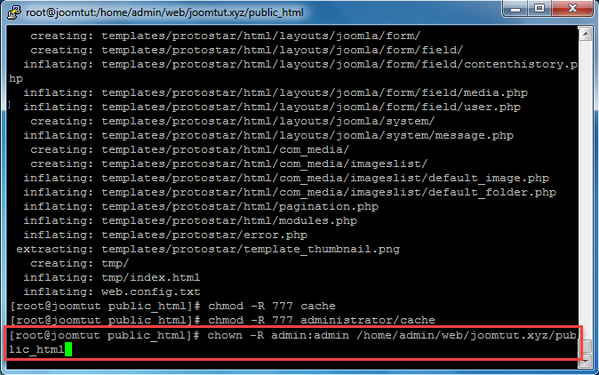
chmod -R 777 cachechmod -R 777 administrator/cache7 Run the chown command to change ownership of Joomla! files and folders in your webroot directory.
chown -R admin:admin /home/admin/web/joomtut.xyz/public_html8 After extracting, you will get the Joomla! files and folder in the public_html directory. You can delete the Joomla! installation package file by run this command:
rm -f Joomla_3-9-16-Stable-Full_Package.zipJoomla_3-9-16-Stable-Full_Package.zip is the name of Joomla! installation package file. This name will vary depending on the current version of Joomla!
9 Run the command to disconnect your SSH connection and close PuTTY.
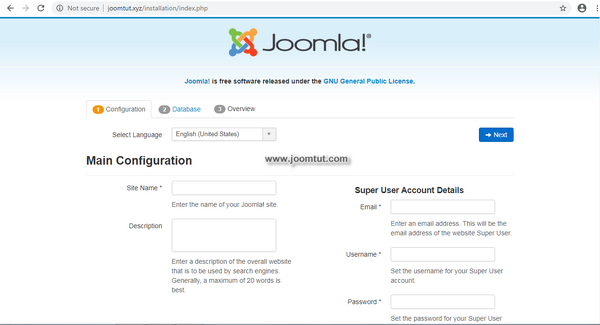
logout 10 Now go to your domain name. Joomla! will automatically run the installer.
Read more: How to install Joomla!

