A database is an organized collection of data, generally stored and accessed by dynamic websites. When you installed VestaCP on VPS, you will be provided with a control panel that allows you to create and manage the database of your website.
Steps to create a new database in VestaCP on private virtual server – VPS
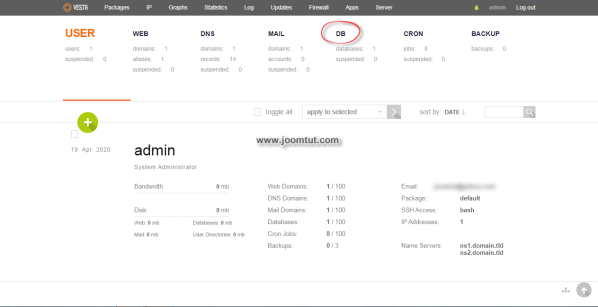
1 Login to your VestaCP account.
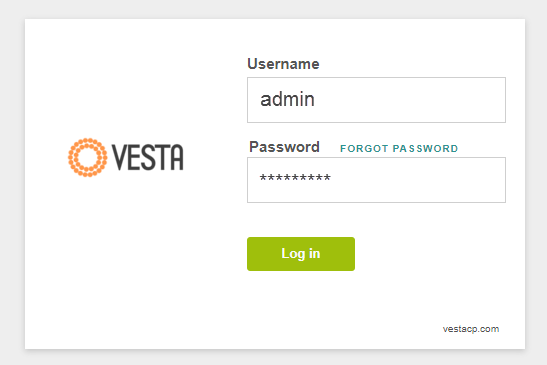
You have been provided an account to login to VestaCP after you have installed VestaCP.
By default, VestaCP's login address is: https://your-domain.com:8083
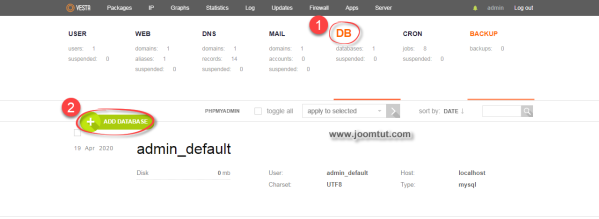
2 In VestaCP, go to DB section
3 Click on the button with the plus sign, it will show Add Database.
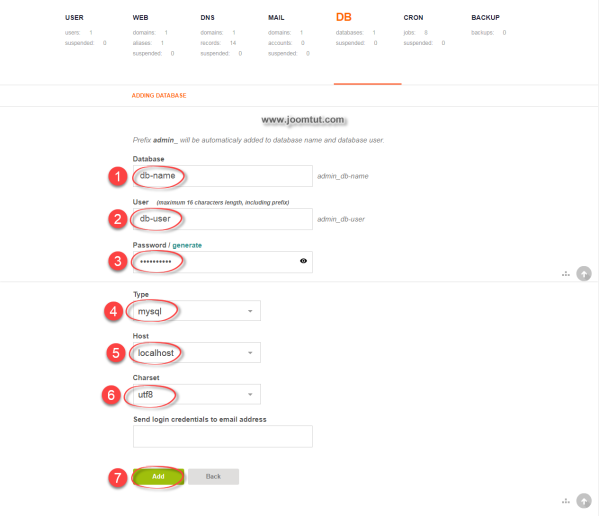
4 In Adding Database, please follow these instructions:
- Enter the name for your database. The database name prefix is available and cannot be changed.
- Enter the name for MySQL user. The username prefix is available and cannot be changed
- Enter password for MySQL user. You can set your own password or use a password generator by click on the Generator text link.
- Select the SQL data type. If you don't know what to choose, please keep the default is: mysql
- Select the MySQL Host. If you don't know what to choose, please keep the default is: localhost
- Select charset for your database. If you don't know what to choose, please keep the default is: utf8
- Click Add button when done.
Please remember your Database Name, MySQL User and password.
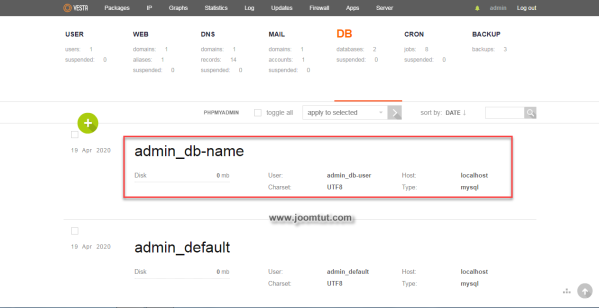
After the database is created, you will see a list of databases in the DB section.

